Creating an Interaction
Creating an Interaction
Note: You cannot edit interactions when in VR mode. You will need to either disconnect/power-off your VR headset or (starting with 0.7.0) use the 'yiffalicious_novr.exe' launcher to run the app with VR disabled.
Contents
[hide]Select a Level
Before editing an interaction, you may want to change the level ("Select Level" in the left hand menu). Do this before you start editing as changing the level clears out all characters and props.
Edit Interaction
When you have loaded the level you want, or loaded a previous interaction you want to edit, you are ready to click the "Edit interaction" button.
A list of these menu options is detailed in Posing Functions.
Add / Remove Characters or Props
In Edit mode the left hand panel changes to include the options you need for adding and removing characters and props, as well as movement and rotation tools.
Helpful Info
- Character order is currently important, to attach a character with a penis to another character the penetrated character must already be added to the scene.
- When attaching a character to another, if the bottom character is not on their back the top may end up upsidedown. This can be fixed with the pink node in front of them. Example
- You can select and remove just the character doing the penetration, however selecting and removing the character being penetrated with another character attached will remove BOTH characters. There is no undo for this.
Posing your characters
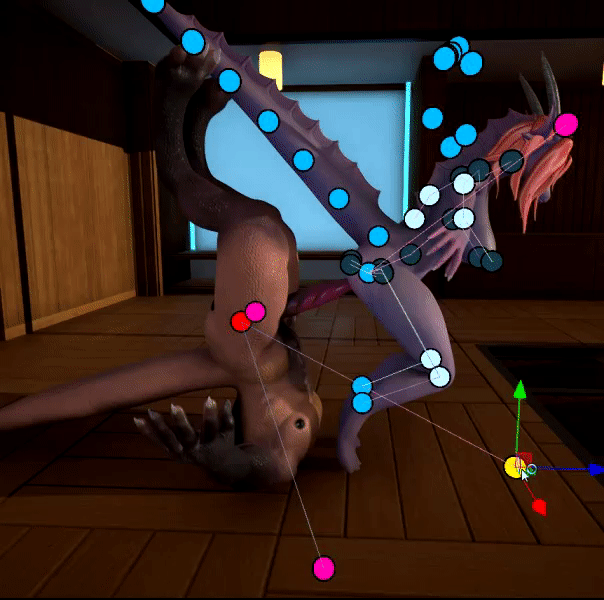
| Posing is done using the nodes of the skeleton.
In the example to the right you can see:
|
Thrust force direction override
On characters with a penis you can select the node at the base of the penis to specify the direction that thrust force will be applied. Use the Force>Override Character Sliders to control whether the blue arrow direction is used.
You can move the character's skeleton nodes similar to other 3D applications. For more details see Posing Functions
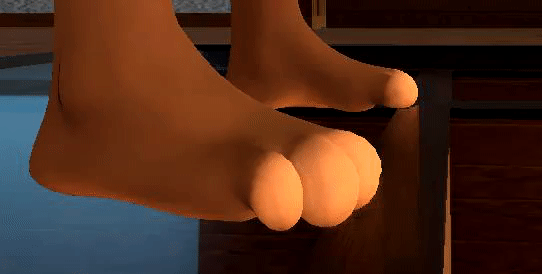
Helpful Info
- If you want the characters feet or hands to not rotate along with movement create a node and add a slight amount of rotation. Notice in this example how the foot in the front does not move like the foot in the back.
Set up expressions
See Character Sliders for a list of everything that can be adjusted.
The amount of expression (or blend shape) that is applied is defined as the 'weight'.
When attached to another character the expression weight (how much the expression is applied) will also have a 'driver'.
The driver controls how much of the defined weight should be applied based on penetration. For example, you might want a character to squint, or open their mouth more when being penetrated. This expression would increase in weight as the character is being penetrated.
Create Snapshots
| Snapshots are how you can add progression to your interaction.
Most of the character slider values are stored in the snapshot, so be creative. Change the speed of thrusting, their facial expressions, etc. When you have the sliders set up in a way you like, switch to "snapshots" and create a new snapshot. Click snapshots again to view a list of characters, tweak the sliders, and repeat. Clicking the "paper + pencil" icon on the snapshot will let you edit the snapshot settings. You can configure the snapshot to transition into another snapshot, and how long this transition will take. Snapshots can also be configured to trigger a "cum event", if you have configured a character to do so, a cum event will cause inflation. The characters with a penis will also visibly cum. |
Save and/or Publish
Saving
When your new interaction is done, or you want to save your progress so far, click the "save" button at the very bottom of the left hand panel.
Specify the name you would like to give this interaction.
Note: There is currently a bug related to the slash character, it is best to avoid this character until this bug is fixed
Publish Interaction
To publish this interaction, click "stop editing" to exit edit mode.
Then click "Publish interaction", this will present you with a list of your local interactions that you can upload to share with others.
Note: If you are not logged in, or do not have an account you will need to create one before you are able to upload. This account is separate from your patreon or forum account.
Tags will automatically be added based on what props and characters are in the scene, as well as what type of penetration is taking place. You are free to add whatever tags you like before publishing.